Regular Inspection and Maintenance
Regular testing and inspection will help to maximise battery life. A routine inspection at least once a month is recommended to maintain optimum performance.
Use the following as a guide when examining your battery:
-
 Check the battery's state of charge. Most batteries have a State of Charge Indicator on top of the battery that will give you an on the spot diagnosis of the battery condition. However, a more reliable way to check is with a voltmeter to determine the stabilised voltage or if the vent caps are removable a hydrometer to determine the specific gravity (SG) of the electrolyte. A charged Century battery will have a stabilised voltage above 12.5 volts and an SG reading above 1.240.
 -
Ensure the battery top is clean, dry, free of dirt and grime. A dirty battery can discharge across the grime on top of the battery casing.
-
Inspect the terminals, screws, clamps and cables for breakage, damage or loose connections. These should be clean, tight and free of corrosion.
-
Apply a thin coating of high temperature grease to posts and cable connections for added protection.
-
Inspect the battery case for obvious signs of physical damage or warpage. This usually indicates the battery has been overheated or has been overcharged.
-
If you have a maintainable battery, it is important to check if the battery has sufficient electrolyte covering the battery plates. If topping up is required, do not over fill as the fluid levels will rise when the battery is fully charged and may overflow. Top up using distilled or demineralised water and never fill with sulphuric acid.
-
When servicing a sealed maintenance free (SMF) battery, check the State of Charge Indicator. This gives you a snap shot of the battery's condition and whether the battery needs to be charged or replaced. The vehicle may still start the engine although the indicator outlines to replace the battery. If the State of Charge Indicator advises 'Replace Battery' it is important that the battery is replaced as the electrolyte levels may be below the plates which can lead to an internal explosion.
-
For batteries used in seasonal applications and stored long term, fully recharge the battery prior to storing. Check the state of charge or voltage regularly. Should the voltage drop below 12.5V, recharge the battery. It is important to check the battery completely before reconnecting to electrical devices.
If you are unsure about the condition or state of charge of the battery, take it to your local Century battery reseller. They can inspect and test your battery and provide you with professional advice and assistance.
Battery Testing
Battery testing should be considered an integral part of any periodic vehicle maintenance routine and should be performed whether or not a starting problem has occurred. Due to the increased electrical demands on the battery, little warning is given before failure. Pre-emptive battery replacement can help eliminate many of the costs and problems associated with a flat or end of life battery.
Before testing a battery, it is important that the battery is fully charged. Even a slightly discharged battery can give a false reading and deem the battery faulty when all that is required is a recharge.
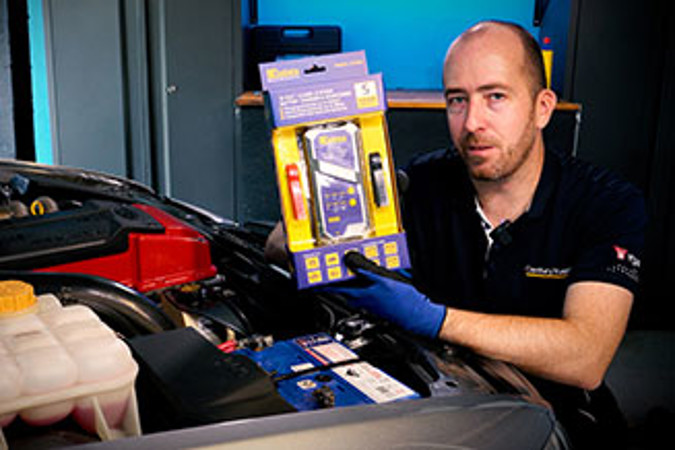
There are many different types of testing equipment available. A digital battery tester is the preferred option as they are safe, easy to use and offer a quick diagnosis of the condition of the battery. Fixed and adjustable load testers, voltmeters, hydrometers and discharge testers can also be used, however correct training is required prior to using any of these testers to prevent personal injury or damage to the vehicle.
Hydrometer
 The state-of-charge of a lead acid battery can be determined by the specific gravity (SG) of the electrolyte (its density compared to a reference such as water). The SG can be measured directly with a hydrometer or indirectly by the stabilised voltage with a voltmeter. Please note the temperature of the acid affects the result.
Digital Battery Testers
 Microprocessor controlled digital battery testers are easy to use, very safe and can help determine early battery failure. The tester works by transmitting a small signal through the battery that uses measurements of conductance or resistance (impedance) to indicate battery condition.
Most models provide battery, starting and charging tests. Printer options enable results to be given to the customer.
Adjustable Load Testers
 Adjustable load testers are a reliable method to determine the starting capacity of a battery as the test applies a real load similar to when cranking the engine. This load however does create a spark risk if leads are connected to corroded or loose terminals.
The standard test is to load the battery to 50% of its CCA rating (Cold Cranking Amperes) for 15 seconds. If the voltage reads above 9.6 volts the battery is ok. For example a battery that has a CCA rating of 600 should be tested at 300CCA for 15 seconds.
The standard interpretation of the result is that if, at the end of the 15 second test, the loaded voltage reading is between 9.6V and 10.6V then the battery is deemed to be good. If the result is under 9.6V the battery is not good and may not crank the engine. It is always recommended that you check the individual manufacturer’s specifications.
Constant Rate Discharge Testers
 Discharge testers are a simple method to check the capacity of a battery and are commonly carried out on Deep Cycle batteries.
The tester works by discharging the battery at a pre-set current (Amps) until it drops to a pre- set disconnect voltage. The biggest concern with this type of tester is the time it takes to perform the test.
As an example, if you were testing a 100 Ah (Ampere Hour) battery at 5 Amps, it could take up to 20 hours to complete the test.
Battery Charging
Charging a lead acid battery is the process of replacing the energy removed during discharge, plus EXTRA to compensate for any charging inefficiencies. The amount of energy necessary for complete recharge depends on the depth of discharge, rate of recharge and temperature. Typically 110% - 150% of the discharged ampere-hours depending on battery type must be returned to the battery to achieve full recharge.
Safety First
Before attempting to charge a battery with an external battery charger, it is important to be aware of the safety precautions when charging batteries and follow the instructions outlined by the charger manufacturer.
- Turn the charger off before attaching, rocking or removing the terminal clamps.
- Keep open flames and sparks away from the battery.
- Keep vent caps in place.
- Charge in well ventilated area.
- Follow the battery charger manufacturer’s instructions to avoid overheating.
Dangerous explosive gases are generated during the charging process that can be ignited by a variety of sources including, sparks, naked flames and static electricity. It is highly recommended to wear PPE (Personal Protection Equipment) including safety glasses, chemical resistant gloves and overalls.
Selecting the Correct Charger
Lead acid batteries should be charged in 3 stages; constant current (boost), constant voltage (absorption) and float charge.
When choosing a battery charger, it is important to select a charger that delivers the specified charging voltage and current to suit the battery type. Flooded, Absorbed Glass Mat (AGM) and Gel battery types require different charging specifications to provide optimum performance and service life.
Charging Voltage (for manual chargers)
Monitoring battery voltage during charging is extremely important to reduce the risk of overcharging and to check the progress of the battery during recharge. Always keep inside the parameters outlined in the below table. Failure to do so can result in permanent damage to the battery.
| Type | Absorption Charging | Float Charging |
| Flooded (Maintainable / SMF) | 14.4 to 14.8V | 13.2 to 13.5V* |
| AGM (Absorbed Glass Mat) | 14.6 to 14.8V | 13.6 to 13.8V |
| Gel Electrolyte | 14.2 to 14.4V | 13.6 to 13.8V |
The recommended temperature during charging is 25°C. Charging must be paused if the battery reaches 50°C.
The above specifications are for 12 volt lead acid batteries. When charging 6 volt batteries, half the voltage specifications provided.
In addition to following the battery charging voltage guidelines, selecting the correct charging current (Amps) for the battery size is crucial to provide performance and service life.
*We do not recommend to float charge flooded Sealed Maintenance Free (calcium) batteries due to risk of drying out of the electrolyte.
Factors Affecting Battery Life
As batteries age they gradually lose their capacity as their function is performed. The constant charge and discharge eventually leads to failure. Components corrode over time, electrical shorts occur and vibration causes damage; all eventually causing failure. Overcharging and undercharging of a battery will also have a bearing on battery life.
Battery Inspection
Check electrolyte level - fluid below the tops of the separators indicates overcharging or poor maintenance. Overcharge condition may be due to incorrect voltage setting, low voltage caused by heat or internal defects, or old age deterioration.
-
Is there electrolyte on the top of the battery? This can indicate overcharging or overfilling.
-
Is the battery loose in the carrier? This can cause failure from vibration.
-
Does the battery have signs of damage or mistreatment? This can also cause failure.
Discharged (flat) Batteries
A flat battery should be checked with a hydrometer. A low Specific Gravity reading of 1.220 or less in all cells indicates a discharged battery and it must be charged before further examination and testing can occur. The discharged condition may be due to a problem in the electrical system (slipping alternator belt, faulty regulator or alternator, high resistance due to corrosion). Internal shorts may also be due to manufacturing defects or shorts through the ageing process or vibration damage.
Early Warning Signs
Batteries often fail when least expected. The usual warning is a slower than normal battery ability to crank the engine. Other less noticeable factors, such as changed driving patterns and colder/hotter weather will all have an effect on the life of a battery. Encourage your customers to ask for a ‘FREE Battery Test’. It’s good public relations and if the battery is near failure, it may avoid the inconvenience of a roadside breakdown.
Technical Tips
Vibration can reduce a battery’s life. Always use an approved battery clamp to limit vibration. Century batteries are built tough, using robust internal components to resist damage through abrasion and puncture from vehicle vibration.
- Many alleged ‘dead batteries’ are merely flat batteries. Drivers simply leave lights on or can have faulty voltage regulators.
-
Ensure your battery is properly tested before replacing a battery.
It’s impossible to know exactly when a battery might fail. A slow starting engine is sometimes an indication. -
Old batteries can give trouble in colder weather.
-
Equally, if an engine area becomes overheated in very hot weather and the battery is under strain from air conditioners it may fail. Regular battery checks are always advised.
Why do Batteries Fail?
Batteries have a finite life, determined by the application and the operating conditions. Battery failure can be attributed to various factors, however the causes of failure fall under two distinct categories: manufacturing and non-manufacturing faults.
Manufacturing Faults
Typically occur within the first 3 months.
Short Circuits/Dead Cells
Where one cell will show a dramatically lower Specific Gravity (SG) reading than the other cells.
Internal Break
Usually resulting from physical damage to a battery during transportation. Century’s stringent quality assurance and inspection processes demanded by leading vehicle manufacturers ensure genuine manufacturing faults in Century Batteries are negligible.
Non Manufacturing Faults
These fall outside of Century’s strict quality control systems and are more likely to occur the longer the battery is in service. They are often attributed to a problem with the vehicle’s electrical system, its operation or the battery application.
Wear and Tear
As a battery ages, grid metal corrodes and active material is lost from the plate. Over time this leads to a point where the battery will no longer be able to start a vehicle. High temperature will accelerate the degradation rates.
Physical Damage
Incorrect fitment, handling and storage often leads to external damage and subsequent battery failure.
Incorrect Application
Fitting a smaller, less powerful battery or a battery designed for another application can lead to early failure.
Negligence
Failure to maintain fluid levels exposes internal components and accelerates battery failure.
Sulphation
Occurs when the battery is allowed to stand in a discharged state for an extended period of time.
Over-Charging
Often caused if the alternator is incorrectly set or the alternator voltage control fails.
Under-Charging
Short journeys, stop start driving or faulty alternators will not fully recharge a battery.
Discharge
Lights or other accessories left on for extended periods.